


Nuxt.js 9번째 포스트네요! 지난 번에는 Nuxt.js의 서버 엔진을 활용하여 API 엔드포인트를 구축하는 방법을 살펴보았습니다. 이번 시간에는 웹 애플리케이션에서 필수적인 요소인 폼(Form) 처리와 유효성 검사에 대해 알아보겠습니다.
1. Nuxt.js에서의 폼 처리 개요
웹 애플리케이션에서 사용자 입력을 처리하는 것은 매우 중요한 부분입니다. Nuxt.js는 Vue.js를 기반으로 하기 때문에 Vue의 강력한 양방향 데이터 바인딩 기능을 그대로 활용할 수 있으며, 여기에 서버 사이드 렌더링과 결합하여 더욱 효율적인 폼 처리가 가능합니다.
폼 처리의 주요 단계
- 사용자 입력 데이터 수집 (v-model 활용)
- 입력 데이터 유효성 검사
- 서버로 데이터 전송
- 응답 처리 및 사용자 피드백 제공
2. 기본적인 폼 처리하기
Nuxt.js에서 기본적인 폼을 처리하는 방법을 살펴보겠습니다. Vue.js의 v-model 디렉티브를 사용하여 양방향 데이터 바인딩을 구현할 수 있습니다.
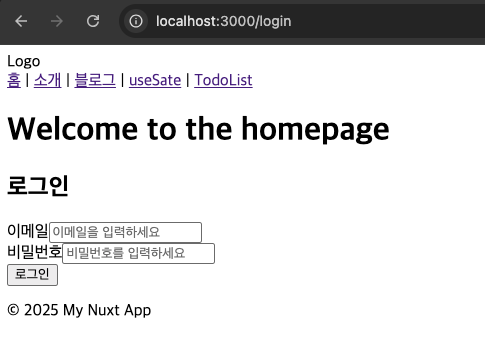
간단한 로그인 폼 예제
//app/pages/login/index.vue
<template>
  <div class="login-form">
    <h2>로그인</h2>
    <form @submit.prevent="submitForm">
      <div class="form-group">
        <label for="email">이메일</label>
        <input
          type="email"
          id="email"
          v-model="formData.email"
          placeholder="이메일을 입력하세요"
        >
      </div>

      <div class="form-group">
        <label for="password">비밀번호</label>
        <input
          type="password"
          id="password"
          v-model="formData.password"
          placeholder="비밀번호를 입력하세요"
        >
      </div>

      <button type="submit">로그인</button>
    </form>
  </div>
</template>

<script setup>
const formData = reactive({
  email: '',
  password: ''
});

const submitForm = async () => {
  try {
    // API 호출 또는 로그인 처리 로직
    console.log('폼 제출 데이터:', formData);
    // 예: await $fetch('/api/login', { method: 'POST', body: formData })
  } catch (error) {
    console.error('로그인 중 오류 발생:', error);
  }
};
</script>
위 예제에서는 v-model을 사용하여 입력 필드와 데이터를 바인딩하고, @submit.prevent를 사용하여 폼 제출 시 페이지 새로고침을 방지했습니다.
3. 유효성 검사 구현하기
사용자 입력 데이터의 유효성을 검사하는 것은 매우 중요합니다. Nuxt.js에서는 여러 가지 방법으로 유효성 검사를 구현할 수 있습니다.
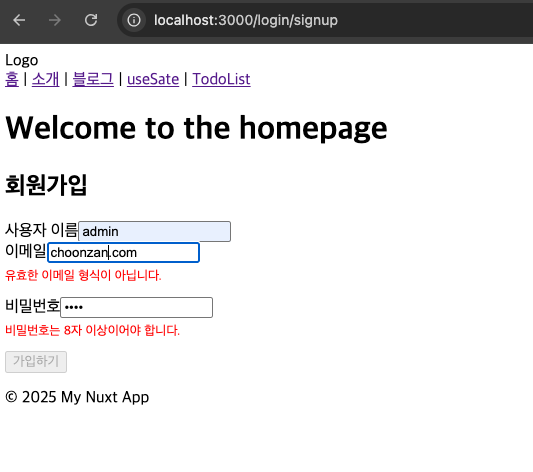
3.1 직접 유효성 검사 구현
//app/pages/login/signup.vue
<template>
  <div class="registration-form">
    <h2>회원가입</h2>
    <form @submit.prevent="submitForm">
      <div class="form-group">
        <label for="username">사용자 이름</label>
        <input
          type="text"
          id="username"
          v-model="formData.username"
          @blur="validateUsername"
        >
        <p v-if="errors.username" class="error">{{ errors.username }}</p>
      </div>

      <div class="form-group">
        <label for="email">이메일</label>
        <input
          type="email"
          id="email"
          v-model="formData.email"
          @blur="validateEmail"
        >
        <p v-if="errors.email" class="error">{{ errors.email }}</p>
      </div>

      <div class="form-group">
        <label for="password">비밀번호</label>
        <input
          type="password"
          id="password"
          v-model="formData.password"
          @blur="validatePassword"
        >
        <p v-if="errors.password" class="error">{{ errors.password }}</p>
      </div>

      <button type="submit" :disabled="!isFormValid">가입하기</button>
    </form>
  </div>
</template>

<script setup>
const formData = reactive({
  username: '',
  email: '',
  password: ''
});

const errors = reactive({
  username: '',
  email: '',
  password: ''
});

const validateUsername = () => {
  if (!formData.username) {
    errors.username = '사용자 이름을 입력해주세요.';
  } else if (formData.username.length < 3) {
    errors.username = '사용자 이름은 3자 이상이어야 합니다.';
  } else {
    errors.username = '';
  }
};

const validateEmail = () => {
  const emailRegex = /^[^\s@]+@[^\s@]+\.[^\s@]+$/;
  if (!formData.email) {
    errors.email = '이메일을 입력해주세요.';
  } else if (!emailRegex.test(formData.email)) {
    errors.email = '유효한 이메일 형식이 아닙니다.';
  } else {
    errors.email = '';
  }
};

const validatePassword = () => {
  if (!formData.password) {
    errors.password = '비밀번호를 입력해주세요.';
  } else if (formData.password.length < 8) {
    errors.password = '비밀번호는 8자 이상이어야 합니다.';
  } else {
    errors.password = '';
  }
};

const validateForm = () => {
  validateUsername();
  validateEmail();
  validatePassword();
};

const isFormValid = computed(() => {
  return !errors.username && !errors.email && !errors.password &&
         formData.username && formData.email && formData.password;
});

const submitForm = async () => {
  validateForm();

  if (isFormValid.value) {
    try {
      // API 호출 또는 회원가입 처리 로직
      console.log('회원가입 데이터:', formData);
    } catch (error) {
      console.error('회원가입 중 오류 발생:', error);
    }
  }
};
</script>

<style scoped>
.error {
  color: red;
  font-size: 0.8rem;
  margin-top: 5px;
}
</style>
위 예제에서는 각 필드에 대한 유효성 검사 함수를 직접 구현하고, 오류 메시지를 표시하는 방법을 보여줍니다.
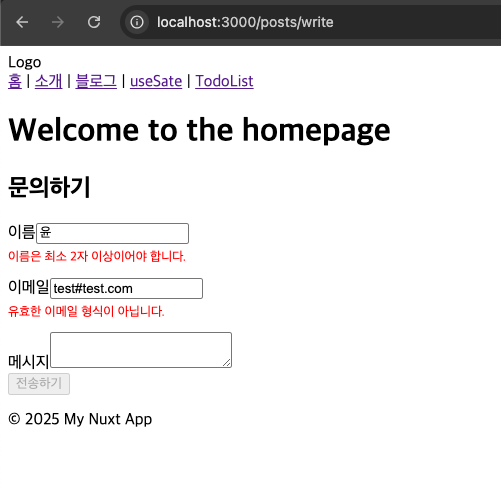
3.2 VeeValidate 라이브러리 활용하기
더 복잡한 유효성 검사를 위해서는 VeeValidate와 같은 전용 라이브러리를 사용하는 것이 효율적입니다. VeeValidate는 Vue.js 생태계에서 가장 인기 있는 폼 유효성 검사 라이브러리 중 하나입니다.
먼저 VeeValidate를 설치합니다:
npm install vee-validate yup
# 또는
yarn add vee-validate yup
VeeValidate와 Yup을 사용한 예제:
//app/pages/posts/write.vue
<template>
  <div class="contact-form">
    <h2>문의하기</h2>
    <Form @submit="onSubmit" v-slot="{ errors }">
      <div class="form-group">
        <label for="name">이름</label>
        <Field
          name="name"
          type="text"
          id="name"
          :rules="nameRules"
          v-slot="{ field, errorMessage }"
        >
          <input v-bind="field" placeholder="이름을 입력하세요" />
          <p class="error" v-if="errorMessage">{{ errorMessage }}</p>
        </Field>
      </div>

      <div class="form-group">
        <label for="email">이메일</label>
        <Field
          name="email"
          type="email"
          id="email"
          :rules="emailRules"
          v-slot="{ field, errorMessage }"
        >
          <input v-bind="field" placeholder="이메일을 입력하세요" />
          <p class="error" v-if="errorMessage">{{ errorMessage }}</p>
        </Field>
      </div>

      <div class="form-group">
        <label for="message">메시지</label>
        <Field
          name="message"
          as="textarea"
          id="message"
          :rules="messageRules"
          v-slot="{ field, errorMessage }"
        >
          <textarea v-bind="field" placeholder="메시지를 입력하세요"></textarea>
          <p class="error" v-if="errorMessage">{{ errorMessage }}</p>
        </Field>
      </div>

      <button type="submit" :disabled="Object.keys(errors).length">전송하기</button>
    </Form>
  </div>
</template>

<script setup>
import { Form, Field } from 'vee-validate';
import * as yup from 'yup';

const nameRules = yup.string()
  .required('이름을 입력해주세요.')
  .min(2, '이름은 최소 2자 이상이어야 합니다.');

const emailRules = yup.string()
  .required('이메일을 입력해주세요.')
  .email('유효한 이메일 형식이 아닙니다.');

const messageRules = yup.string()
  .required('메시지를 입력해주세요.')
  .min(10, '메시지는 최소 10자 이상이어야 합니다.');

const onSubmit = (values) => {
  console.log('제출된 데이터:', values);
  // API 호출 또는 폼 처리 로직
};
</script>

<style scoped>
.error {
  color: red;
  font-size: 0.8rem;
  margin-top: 5px;
}
</style>
4. Nuxt.js에서 폼 데이터 서버로 전송하기
Nuxt.js에서는 useFetch 또는 $fetch를 사용하여 폼 데이터를 서버로 전송할 수 있습니다. 이전 포스트에서 배운 서버 API 엔드포인트와 연동하여 완전한 폼 처리 시스템을 구축할 수 있습니다.
useFetch를 활용한 폼 제출 예제
<template>
  <div class="product-form">
    <h2>상품 등록</h2>
    <form @submit.prevent="submitProduct">
      <div class="form-group">
        <label for="name">상품명</label>
        <input
          type="text"
          id="name"
          v-model="product.name"
          required
        >
      </div>

      <div class="form-group">
        <label for="price">가격</label>
        <input
          type="number"
          id="price"
          v-model="product.price"
          required
        >
      </div>

      <div class="form-group">
        <label for="description">상품 설명</label>
        <textarea
          id="description"
          v-model="product.description"
          required
        ></textarea>
      </div>

      <button type="submit" :disabled="isSubmitting">
        {{ isSubmitting ? '처리 중...' : '상품 등록' }}
      </button>
    </form>

    <div v-if="error" class="error-message">
      {{ error }}
    </div>

    <div v-if="success" class="success-message">
      {{ success }}
    </div>
  </div>
</template>

<script setup>
const product = reactive({
  name: '',
  price: null,
  description: ''
});

const isSubmitting = ref(false);
const error = ref('');
const success = ref('');

const submitProduct = async () => {
  error.value = '';
  success.value = '';
  isSubmitting.value = true;

  try {
    const { data } = await useFetch('/api/products', {
      method: 'POST',
      body: product
    });

    success.value = '상품이 성공적으로 등록되었습니다!';
    // 폼 초기화
    product.name = '';
    product.price = null;
    product.description = '';

  } catch (err) {
    error.value = '상품 등록 중 오류가 발생했습니다. 다시 시도해주세요.';
    console.error('API 오류:', err);
  } finally {
    isSubmitting.value = false;
  }
};
</script>

<style scoped>
.error-message {
  color: red;
  margin-top: 15px;
  padding: 10px;
  background-color: #ffeeee;
  border-radius: 4px;
}

.success-message {
  color: green;
  margin-top: 15px;
  padding: 10px;
  background-color: #eeffee;
  border-radius: 4px;
}
</style>
서버 API 엔드포인트 구현 (server/api/products.post.js)
export default defineEventHandler(async (event) => {
  try {
    const body = await readBody(event);

    // 필수 필드 검증
    if (!body.name || !body.price || !body.description) {
      return createError({
        statusCode: 400,
        statusMessage: '모든 필드를 입력해주세요.'
      });
    }

    // 여기서 실제로는 데이터베이스에 저장하는 로직이 들어갑니다
    // 예시를 위해 성공 응답만 반환

    return {
      success: true,
      message: '상품이 성공적으로 등록되었습니다.',
      product: {
        id: Date.now(), // 임시 ID
        ...body,
        createdAt: new Date()
      }
    };
  } catch (error) {
    return createError({
      statusCode: 500,
      statusMessage: '서버 오류가 발생했습니다.'
    });
  }
});
5. 고급 폼 기능 구현하기
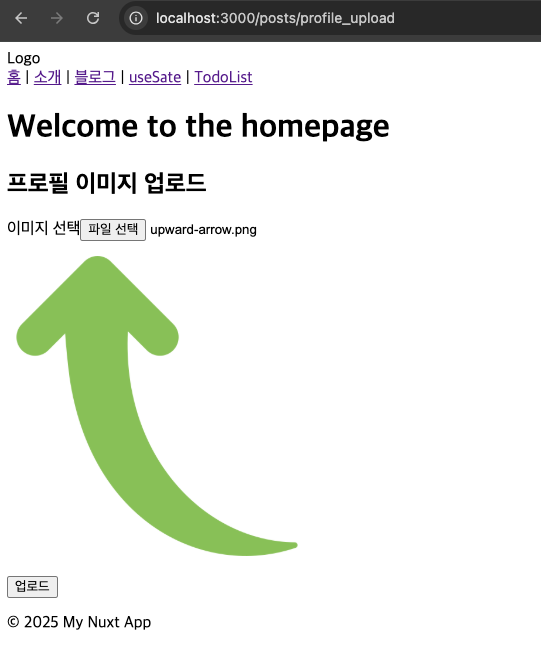
5.1 파일 업로드 처리
이미지나 파일을 업로드하는 폼을 구현해보겠습니다.아직 이미지 파일을 수신하는 백엔드 구성이 되지 않았으므로 전송은 처리 되지 않으나, 프론트 영역에서는 아래와 같은 구성을 참고하세요.
//app/pages/posts/profile_upload.vue
<template>
  <div class="file-upload-form">
    <h2>프로필 이미지 업로드</h2>
    <form @submit.prevent="uploadImage" enctype="multipart/form-data">
      <div class="form-group">
        <label for="profile-image">이미지 선택</label>
        <input
          type="file"
          id="profile-image"
          @change="handleFileChange"
          accept="image/*"
        >
      </div>

      <div v-if="previewUrl" class="image-preview">
        <img :src="previewUrl" alt="미리보기" />
      </div>

      <button type="submit" :disabled="!selectedFile || isUploading">
        {{ isUploading ? '업로드 중...' : '업로드' }}
      </button>
    </form>

    <div v-if="uploadStatus" :class="['status-message', uploadStatus.type]">
      {{ uploadStatus.message }}
    </div>
  </div>
</template>

<script setup>
const selectedFile = ref(null);
const previewUrl = ref('');
const isUploading = ref(false);
const uploadStatus = ref(null);

const handleFileChange = (event) => {
  const file = event.target.files[0];
  if (!file) return;

  selectedFile.value = file;

  // 이미지 미리보기 생성
  const reader = new FileReader();
  reader.onload = (e) => {
    previewUrl.value = e.target.result;
  };
  reader.readAsDataURL(file);
};

const uploadImage = async () => {
  if (!selectedFile.value) return;

  isUploading.value = true;
  uploadStatus.value = null;

  try {
    const formData = new FormData();
    formData.append('image', selectedFile.value);

    const response = await $fetch('/api/upload', {
      method: 'POST',
      body: formData
    });

    uploadStatus.value = {
      type: 'success',
      message: '이미지가 성공적으로 업로드되었습니다!'
    };

    // 업로드 후 폼 초기화
    selectedFile.value = null;
    previewUrl.value = '';

  } catch (error) {
    uploadStatus.value = {
      type: 'error',
      message: '업로드 중 오류가 발생했습니다. 다시 시도해주세요.'
    };
    console.error('업로드 오류:', error);
  } finally {
    isUploading.value = false;
  }
};
</script>

<style scoped>
.image-preview {
  margin: 15px 0;
}

.image-preview img {
  max-width: 300px;
  max-height: 300px;
  border-radius: 4px;
}

.status-message {
  margin-top: 15px;
  padding: 10px;
  border-radius: 4px;
}

.status-message.success {
  background-color: #eeffee;
  color: green;
}

.status-message.error {
  background-color: #ffeeee;
  color: red;
}
</style>
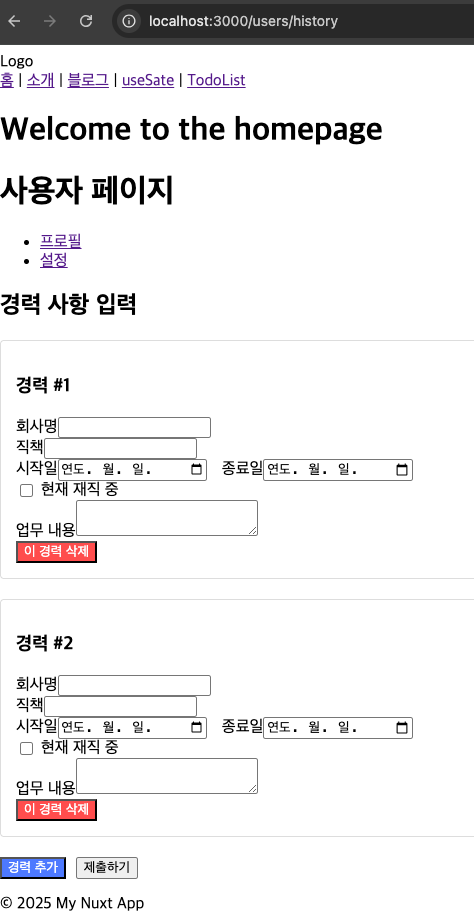
5.2 동적 폼 필드 구현
사용자가 필드를 추가하거나 제거할 수 있는 동적 폼을 구현해보겠습니다.
<template>
  <div class="dynamic-form">
    <h2>경력 사항 입력</h2>
    <form @submit.prevent="submitForm">
      <div v-for="(experience, index) in experiences" :key="index" class="experience-item">
        <h3>경력 #{{ index + 1 }}</h3>

        <div class="form-group">
          <label :for="'company-' + index">회사명</label>
          <input
            :id="'company-' + index"
            v-model="experience.company"
            type="text"
            required
          >
        </div>

        <div class="form-group">
          <label :for="'position-' + index">직책</label>
          <input
            :id="'position-' + index"
            v-model="experience.position"
            type="text"
            required
          >
        </div>

        <div class="form-row">
          <div class="form-group">
            <label :for="'start-date-' + index">시작일</label>
            <input
              :id="'start-date-' + index"
              v-model="experience.startDate"
              type="date"
              required
            >
          </div>

          <div class="form-group">
            <label :for="'end-date-' + index">종료일</label>
            <input
              :id="'end-date-' + index"
              v-model="experience.endDate"
              type="date"
              :required="!experience.current"
              :disabled="experience.current"
            >
          </div>
        </div>

        <div class="form-group checkbox">
          <input
            :id="'current-' + index"
            v-model="experience.current"
            type="checkbox"
            @change="handleCurrentChange(index)"
          >
          <label :for="'current-' + index">현재 재직 중</label>
        </div>

        <div class="form-group">
          <label :for="'description-' + index">업무 내용</label>
          <textarea
            :id="'description-' + index"
            v-model="experience.description"
            required
          ></textarea>
        </div>

        <button
          type="button"
          class="remove-btn"
          @click="removeExperience(index)"
          v-if="experiences.length > 1"
        >
          이 경력 삭제
        </button>
      </div>

      <div class="form-actions">
        <button type="button" @click="addExperience" class="add-btn">
          경력 추가
        </button>
        <button type="submit" class="submit-btn">제출하기</button>
      </div>
    </form>
  </div>
</template>

<script setup>
const experiences = ref([
  {
    company: '',
    position: '',
    startDate: '',
    endDate: '',
    current: false,
    description: ''
  }
]);

const addExperience = () => {
  experiences.value.push({
    company: '',
    position: '',
    startDate: '',
    endDate: '',
    current: false,
    description: ''
  });
};

const removeExperience = (index) => {
  experiences.value.splice(index, 1);
};

const handleCurrentChange = (index) => {
  const experience = experiences.value[index];
  if (experience.current) {
    experience.endDate = '';
  }
};

const submitForm = async () => {
  try {
    console.log('제출된 경력 데이터:', experiences.value);
    // API 호출 또는 폼 처리 로직
    // 예: await $fetch('/api/experiences', { method: 'POST', body: { experiences: experiences.value } })

    alert('경력 정보가 성공적으로 제출되었습니다!');
  } catch (error) {
    console.error('제출 중 오류 발생:', error);
    alert('제출 중 오류가 발생했습니다. 다시 시도해주세요.');
  }
};
</script>

<style scoped>
.experience-item {
  border: 1px solid #ddd;
  padding: 15px;
  margin-bottom: 20px;
  border-radius: 4px;
}

.form-row {
  display: flex;
  gap: 15px;
}

.form-actions {
  margin-top: 20px;
  display: flex;
  gap: 10px;
}

.remove-btn {
  background-color: #ff4d4d;
  color: white;
}

.add-btn {
  background-color: #4d79ff;
  color: white;
}

.checkbox {
  display: flex;
  align-items: center;
  gap: 5px;
}

.checkbox input {
  width: auto;
}
</style>
결론
폼으로 입력필드를 구성하여, 사용자가 작성한 글이나, 파일들을 서버로 전송하도록 하는 폼 예시에 대해서 포스트 하였습니다. 이 과정에서 입력값에 대한 Validation을 위해서 vee와 yup을 사용하였습니다. 복잡한 validation이 단순하고 간편하게 사용되고, 대부분의 프로젝트에서는 이러한 체크가 많이 발생되므로 미리 알아두면 좋을것 같습니다.
백엔드 API구성에 대해서는 다른 포스트를 회차로 구성하여 설명하도록 하겠습니다.
답글 남기기